Work In-Progess
03/18/2010
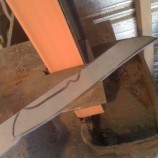
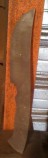
Here, you can see that I've drawn the outline on the steel and have started profiling the knife on the belt grinder. I am using a worn 40 grit Norton Blaze belt to do the rough-profiling.
03/18/2010
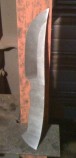
The profiling is now complete. I also use the same belt to clean up the sides of the blade. It's starting to resemble a knife, but it's still a ways off.
03/18/2010
Now, I changed the belt for an 80 grit Norton Blaze and ground in the bevels. I also went over the flats again with this belt. Getting it a little smoother...
Next I'll use a 120 grit belt to further smooth the bevels and flats of the blade.

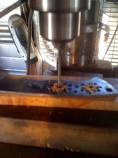
03/20/2010
In this picture you can see that I've further ground the bevels and flats. I've also drilled the holes for the handle pins and a hole for the thong tube (if the customer so desires a thong hole). You can see where I've drilled quite a few holes towards the rear of the handle to reduce the handle weight. This will result in a knife that's better balanced in the hand.
03/23/2010
Ok, so now I've clamped the blade, along with a thin piece of osage orange for support, into my knife vise. I'll start with some 220 grit waterproof sandpaper that is wrapped around a small piece of marble. This will help keep the flat areas flat, without rounding over the grind lines. I also keep the blade spritzed with either Windex or WD40. This helps keep the grits from clogging the sandpaper and also produces a finely-gritted slurry that also helps in polishing the blade. You can use many different liquids to achieve this; some use different types of oils, water, etc.
03/23/2010
It's about 30 minutes later and this side of the blade is mostly done with the 220 grit sandpaper. There are still some scratches to be removed, though, so I'll pick back up here tomorrow, after I pick up some more sandpaper :)
It's starting to have that nice, hand-rubbed finish, though, and once I take it through the higher progressions of grits, to 320, 400, 600, and then 1000, it will have a very, very nice finish. I'll only take it to about 400 now, before heat-treat.
03/24/2010
Ok, went by the hardware store and purchased mucho sandpaper... No pictures of finishing the hand-sanding, just more of the same. Back and forth, back and forth.
03/24/2010
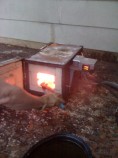
Time to remove the blade from the oven!
Since this is O1, I brought it up to 1490F and let it "soak" there for 15-20 minutes. O1 isn't difficult to heat-treat, but it requires that period of time at temperature to get the most out of it.
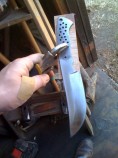
03/24/2010
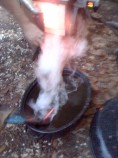
Here I'm quenching the blade. I'm using a quench oil from McMaster-Carr. I dip the blade in, edge first, as if I'm "cutting" into the oil. Up and down, and forward and backwards motions only. Absolutely no side to side motion while in the quench, since that can contribute to warpage in the blade.
Now it's off to the oven for a couple of two hour tempers!
Tomorrow I'll clean up the blade and then have the hardness tested. Then it's time to start picking out the wood for the handle.
03/25/2010
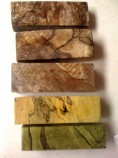
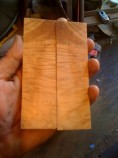
Before we proceed any further, let's send the customer some choices for the wood for the handle...
These are all spalted maple.
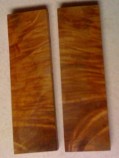
03/25/2010
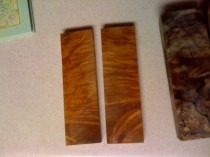
This set of scales is flamed maple.
We'll see what the customer picks out!
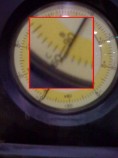
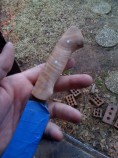
03/26/2010
Took the blade in and tested it on a hardness testing machine. The hardness measured at just a smidge over 59RC, excellent!
03/26/2010
And we have a winner! The customer chose the flamed maple scales, great choice! Tomorrow we'll do the final touch-up on the blade and then start the process of attaching the scales.
This process has quite a few steps, so tomorrow there should be lots of pictures!
03/27/2010
Ok, since both of the scales are smaller than the platen on my grinder, I sand them pretty flat here, one at a time. This is a very coarse belt, so I'll have to do some more work on making sure they're good and flat.
03/27/2010
Now I take each of the scales and sand them on a 4X36 sander. This sandpaper is not nearly as coarse, so we end up with a nice flat side on each of the scales.
03/27/2010
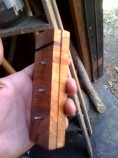
Here are the scales after they're good and flat. These are bookmarked scales, so you can see how the grain in each piece lines up with the other.
03/27/2010
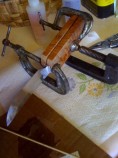
Now I've put a few drops of super-glue on the handle and clamped the scale to it. I'll let it set for about 10 minutes to make sure there's a pretty good bond. This isn't the final bonding for the handle, just something to hold the scale in place on the handle while I drill the holes for the pins. Once I'm finished drilling the scale, the scale will pop off with just a little knock against the bench.
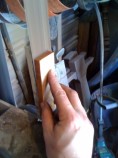
03/27/2010
Here I'm drilling the holes in the scale using an 1/8" bit. I'll also ream the holes in the wood out just a small amount so the pins don't have to be forced through.
03/27/2010
Now I put the pins into the scale, then lay the blade onto the scale using the pins as guides. I have to mark where to grind the scale down to and get the front edge of the scales finished before final attachment. Otherwise, there's no good way to finish the front edge of the scales once they're attached.
03/27/2010
I put the scales together using the pins as guides. Next I'll take them to the grinder and grind off the front edge down to the mark. Then I'll round off the front edge and they'll be ready to attach.
03/27/2010
I cleaned the handle with acetone to make sure it's good and clean, and also lightly went over the scales, too. Then, I mixed the epoxy, applied it to the handle, and put on the scales. I used clamps to hold it tightly, but not super tight. I don't want to squeeze all of the epoxy out.
You'll notice that there's something white on the blade just in front of the scales. I dry-fit the scales to the blade before epoxying them, and applied a little bit of balmex to the front edge. You can also use petroleum jelly, etc., whatever will keep the epoxy from sticking. This makes cleanup after the epoxy has dried MUCH easier.
The epoxy sets up pretty quickly, but I like to wait overnight before I work with the scales just to make sure everything is good and set up before I start shaping the handle.
03/28/2010
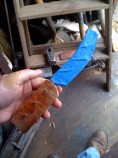
Here I've taken the clamps off of the handle. I've also taped up the blade so that I'm less likely to cut myself as well as prevent any scratching on the blade while I'm shaping the handle.
03/28/2010
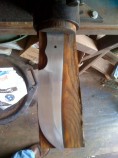
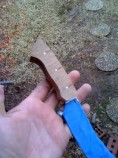
This is showing the outline of the handle after I've profiled it on the grinder. Both sides are still flat and I'll use a rasp and put the initial shape on the handle by hand.

03/28/2010
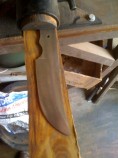
Here the knife is shown in the knife vise. You can see that I've put some of the initial shaping on the handle. I'll twist it around and work on each side until I'm happy with how it fits in my hand. The finish of the handle will be very rough at this point, so once I'm done rough-shaping the handle, I'll take it to the grinder with a 120 grit belt. This will put a much smoother finish on the handle and make it ready to start hand-sanding.
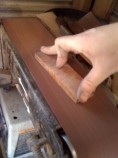
03/28/2010
This is showing the handle after it's been on the grinder on the 120 grit belt. Much smoother than the finish the rasp left. Now it's time to start hand sanding. I'll start at 220 grit and work through the coarseness levels from there.
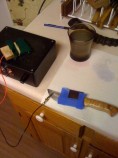
03/30/2010
I finished the handle, so now it's time to etch my logo into the blade. The black box in the picture is a homemade etching unit (thanks to plans by Chris Crawford). The glass contains hot saltwater, and I'll dip the felt-covered electrode in the saltwater and dab it onto the stencil about 20 times. The saltwater completes the circuit and etches the design through the stencil. In case anyone is wondering, I get my stencils from Ernie Grospitch, great service and product.
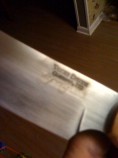
03/30/2010
Here you can see the logo etched into the blade. There is a little bit of cloudiness around the logo, but some 1500 grit sandpaper will take that right off. Next up is sharpening the blade, and then we'll start on the sheath tomorrow.
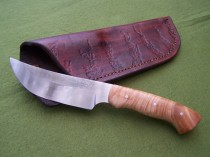
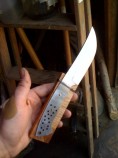
04/05/2010
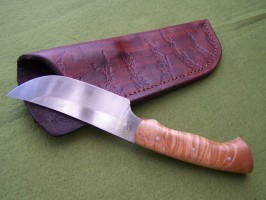
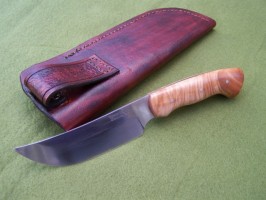
And here's the finished product. The only steps I didn't show were the sharpening and the final once-over the blade with a high-grit sandpaper. I just finished the sheath today and it needs to dry for a few days before we put the blade in it.
Hope you enjoyed following along!
Tobin